This is the second part of my post series on macro photography. In this post, I will discuss the topic of focusing in macro photography. A picture of the greatest subject is unusable if it is out of focus and this can’t be fixed in post-production.
Why is focusing in macro photography so difficult?
Focusing in macro photography is challenging for three reasons. First, the depth of field is extremely shallow. The depth of field is the area around the focus plane where the image is acceptably sharp. While the image is only in the focus plane really sharp, the image get’s softer the further the object is from the focus plane. The depth of field is influenced by the
- focal length (longer focal lengths result in a smaller depth of field)
- focusing distance (closer focusing distance results in a smaller depth of field)
- the aperture (bigger aperture/smaller f-stop leads to a smaller depth of field)
- the sensor size (bigger sensors produce images with a smaller depth of field).
Macro photography, in the pursuit of higher magnification ratios, drives the focal length up and the focusing distance down. This extremely reduces the depth of field. As we can’t change the sensor size and for other reasons prefer larger sensors, the only option to retain some depth of field is to choose a higher f-stop. This is one of the reasons why lighting in macro photography can be very challenging: By striving for enough depth of field for a useful image, you (by choosing, for example, f16) reduce the amount of light hitting the sensor to a minimum.
Second, the movement of the subject and the camera lead to changes in the distance between the subject and the camera. Combined with the very shallow depth of field, the subject is quickly out of focus.
Third, each lens has a minimum focusing distance. The camera cannot focus on closer points than this distance. When working close to this distance, it happens that the camera is too close and focusing is impossible.
Macro Photography Focusing Tips
The best focusing technique depends on the actual situation. What size is the subject? Is it static or moving? Will it run/fly away?
Focusing tips for close-up photos
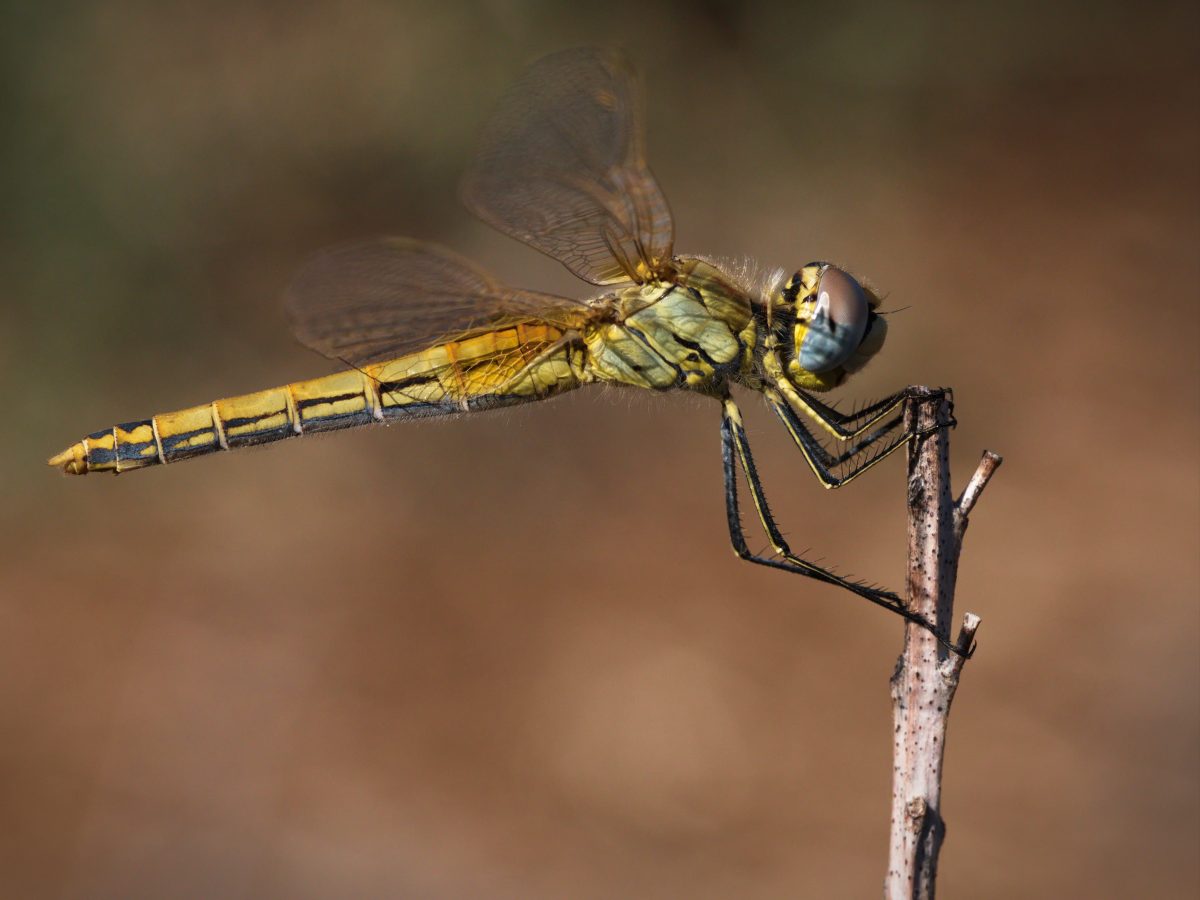
A normally well-hidden insect with the focus perfectly on the eyes
When focusing on relatively large subjects like bees, wasps, dragonflies, or flowers, the camera is usually a few centimeters further away from the subject than the minimum focusing distance. That allows for a focusing technique that combines the autofocus and moving back and forth. I use the autofocus, but not in a conventional way. I use back-button-focusing with a small selected focus area, which I place according to my composition. This essentially brings the focus very close to the right plane. As a final step, I move the camera back and forth to exact position the focus, while I take many pictures – often in burst mode. With focus peaking enabled and the camera set to manual focus, also the time to take a picture is reduced. Furthermore, any focus hunting of the camera is suppressed. This often helps to catch the moments when the subject is in focus.
Focusing strategy at life-size magnification
Close to 1:1 magnification, the autofocus gets less useful. When it is triggered, it often will move through near infinity and back which costs quite some time. This happens always when the camera is too close to the subject. But as we are anyway working at the minimum focusing distance, this often occurs. Often, it is easier to get the shot, when using the manual focus. Focus on the minimum focusing distance and move the camera back and forth to get the subject into focus. On my Olympus M.Zuiko 60mm f2.8 Macro lens, I experience significant focus breathing. That means the focal length of the lens gets actually longer (zoom in) when it focuses closer. This behavior can make focusing a pain, so it is better and faster to use the manual focus with focus peaking or the focus lens.
A few final tips
- Don’t get discouraged when you missed focus on some pictures: In macro photography, there is a significant rate of unusable shots. Depending on the situation, one third or fewer pictures turn out usable.
- If you can, move the object towards or from the lens to shift it into focus. When the wind is shaking your subject, this is much easier than catching the right moment with the camera’s shutter button. You can also touch the object and the camera at the same time to couple their movements. This is very useful for plant pictures outdoors, as it can suppress movements induced by the wind. Though, some insects might be disturbed by unexpected movements of their seat.
- For static scenes, a small tripod (e.g. this one*) or a bean bag (see this*) can be very useful. On a tripod, a focusing rail is very handy. It allows to precisely adjust the camera position in the rail direction, which is just impossible to do with a camera ball head.
This was part two of the macro photography article series. If you missed part one, go and check it out. Make sure to subscribe to my email list to get notified about part three of this series.
*: Affiliate Link
[…] it easier, as focusing with the shallow depth of field can easily go wrong. Read my article about focusing in macro photography to learn […]