Taking macro pictures might seem very difficult at first sight as many things can go wrong. The depth of field is often very shallow, which makes focusing challenging. Getting up close might disturb the subject (if it’s alive) or at least cast shadows. Natural light is often not sufficient. Yes, it is not easy to nail it, but you can try again and again and again … your subject also won’t be angry, if it takes longer. Often, you can make it at home or on a walk through some nature around – no traveling required. So, in my opinion, is macro photography a perfect opportunity to try out your camera and create stunning pictures while exploring your surroundings. There is a lot less pressure than in other genres of photography, which can, especially for the novice photographer, be scary.
What is macro photography?
Macro or close-up photographs are fascinating as they show very uncommon perspectives and details of everyday objects and animals. Structures of matter, eye to eye with creepy crawlies, stunning details of flowers, and much more can be explored when you get closer to your subject. We call a photo a macro photo a photo which is taken close to 1:1 magnification. The magnification ratio compares the sizes of an object and its image through a lens on the camera sensor. 1:1 magnification means that the object is projected in life-size onto the sensor, while 1:2 magnification means that the projection is only half the size of the object.
A 1:1 magnification ratio might sound not really like a big deal, but it already enables full-size prints of objects in the size of the image sensor. I came across macro photos with a magnification of 1:0.2, that means the picture on the sensor was 5 times larger than the subject. With these super high magnifications, stunning pictures of details can be taken. But very advanced techniques like focus stacking with hundreds of images have to be employed to produce a single image with sufficient depth of field. First things first: Let’s test how close we can get without special gear.
How to get started – test how far (better: close) you get with your gear!
How close in terms of magnification you can get with your lens depends on the focal length and the minimum focusing distance. Longer focal distance and shorter minimum focusing distance get you larger magnification. Just try it out: Switch to manual focus, zoom fully in, focus
- Switch to manual focus
- Zoom fully in (largest focal length), if you have a zoom lens
- Focus as close as possible
- Move your camera closer towards a subject until it is in focus
What you see now is the maximum magnification you can get with your setup. It can already give some nice results, although it will not be real macro photography. In the next Section, we learn about the options to improve the minimal focus distance.
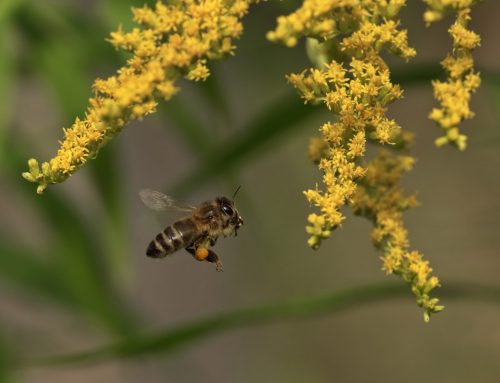
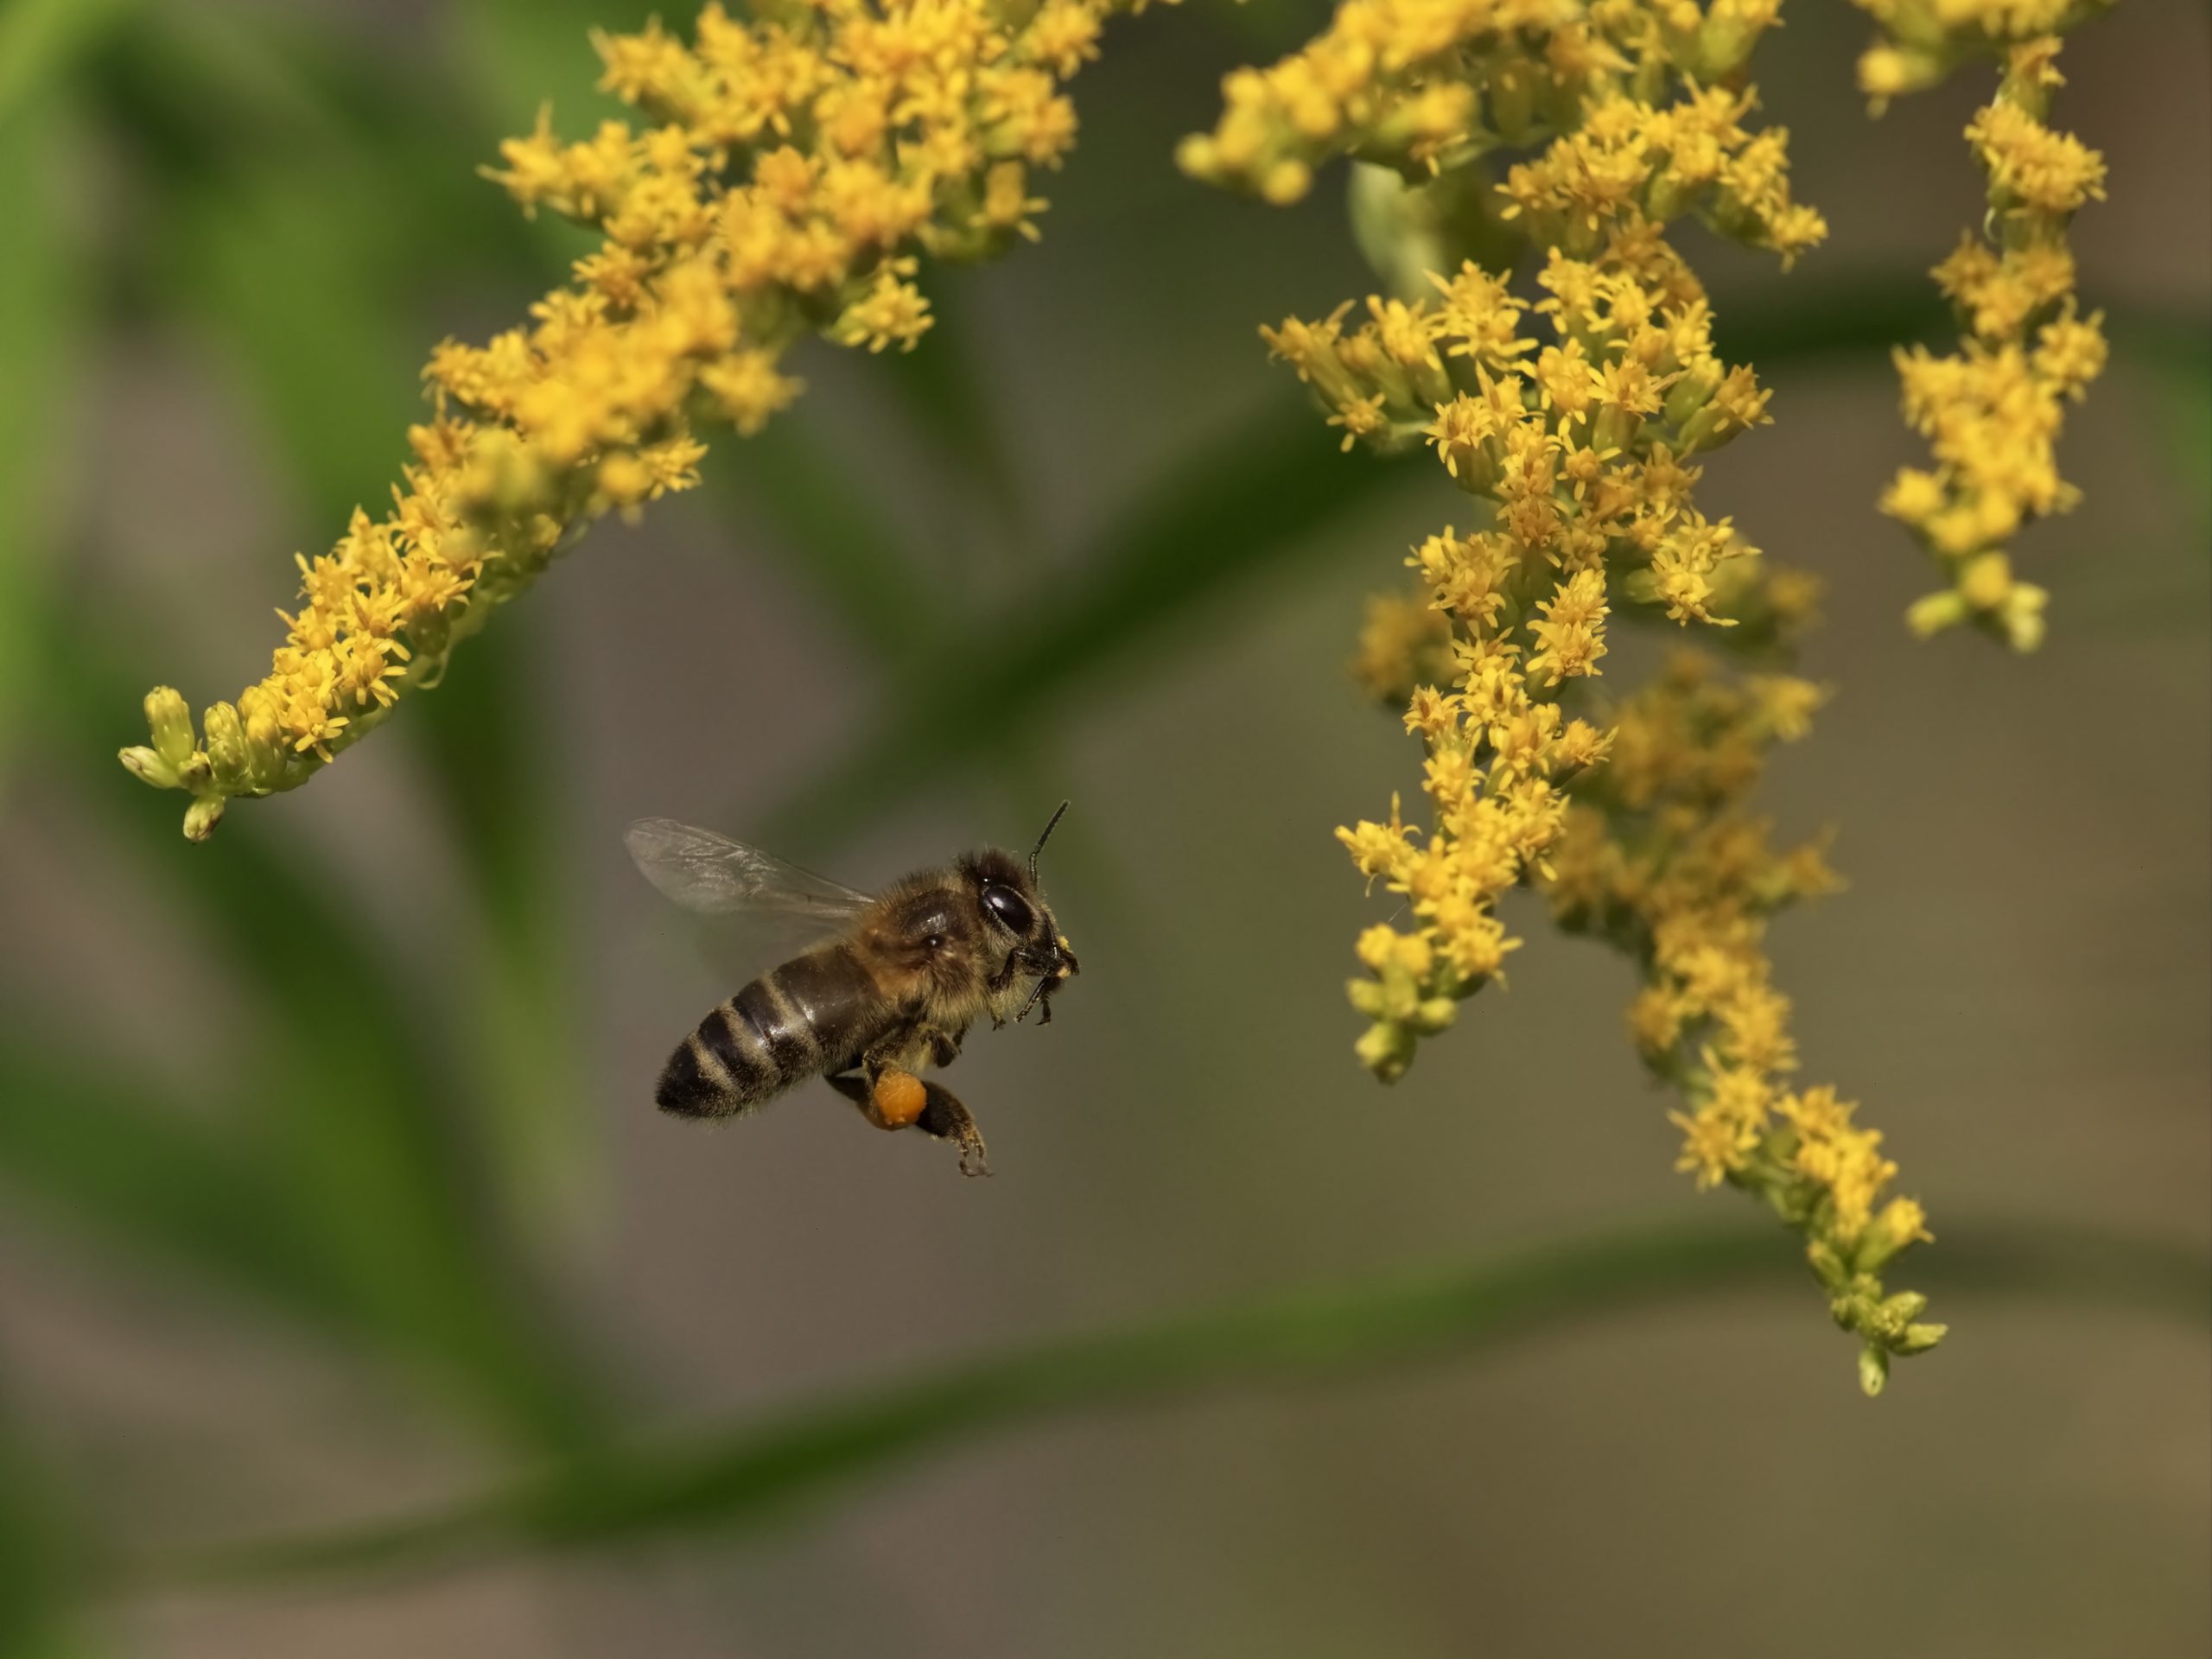
LUMIX GX8 with LUMIX G VARIO 14-140/F3.5-5.6 @140mm, f5.6 & ISO400. Slightly cropped for composition.
Increasing the macro capabilities of your setup with extension tubes
By the use of extension tubes, the distance between the lens and the camera sensor is increased, which enables shorter focusing distances and thus higher magnification. This is one of the cheapest options to get closer to your object. Extension tubes come in different sizes, qualities, and with or without electrical interfaces. Using a longer extension tube, let’s you focus closer, but also limits the maximum focus distance. Yes, with extension tubes, you might not be able to focus on infinity anymore. When using a digital lens (without mechanical focus and aperture control), an extension tube with an electrical interface is mandatory. Otherwise, focusing and controlling the depth of field through the aperture is impossible.
When I combined my Panasonic 14-140mm lens with 36mm extension tubes, it is impossible to focus at all at 14mm. At 25mm just the dust on the front lens element comes into focus. At 140mm, the minimal focus distance is around 7 cm and the maximum focus distance is around 1 m. This is a pretty small working range and one of the main disadvantages of dedicated macro lenses. The other advantage of real macro lenses is the image quality. They are built to deliver very sharp images while using extension tubes pushes a not-super-sharp lens beyond what it was made for.
The following four pictures show the difference in the minimal focus distance of a 36mm extension tube for two of my lenses (Panasonic 14-140mm and Olympus 60mm macro) :
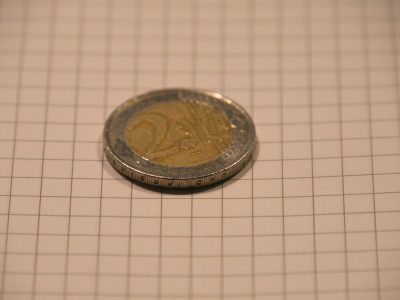
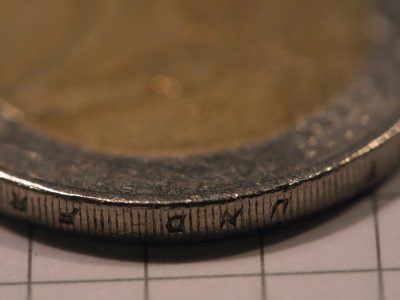
Panasonic 14-140mm @140mm focused manually on the closest point possible. Magnification: ca. 1:3.8
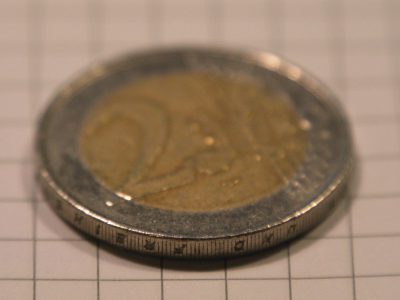
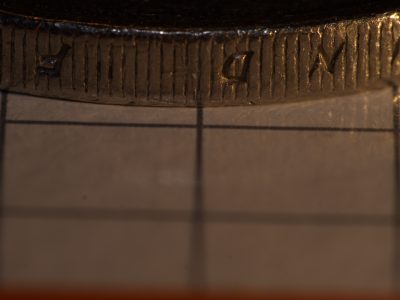
Panasonic 14-140mm @140mm with 36mm extension tubes focused manually on the closest point possible. Magnification: ca. 1:1.76
Olympus 60mm f2.8 macro focused manually on the closest point possible. Magnification: 1:1
Olympus 60mm f2.8 macro with 36mm extension tube focused manually on the closest point possible. Magnification: 1:0.59
Did you ever notice that dedicated macro lenses are usually of longer build size than non-macro lenses with the same focal length? That is because they kind of have an built-in extension tube. But of course, that is not the only difference.
Another option to get greater magnification is the use of close-up lenses (diopters). Close-up lenses get mounted to the front of a lens and also let you focus closer. As soon as I get one of those lenses, I will and write about it and leave a link here.
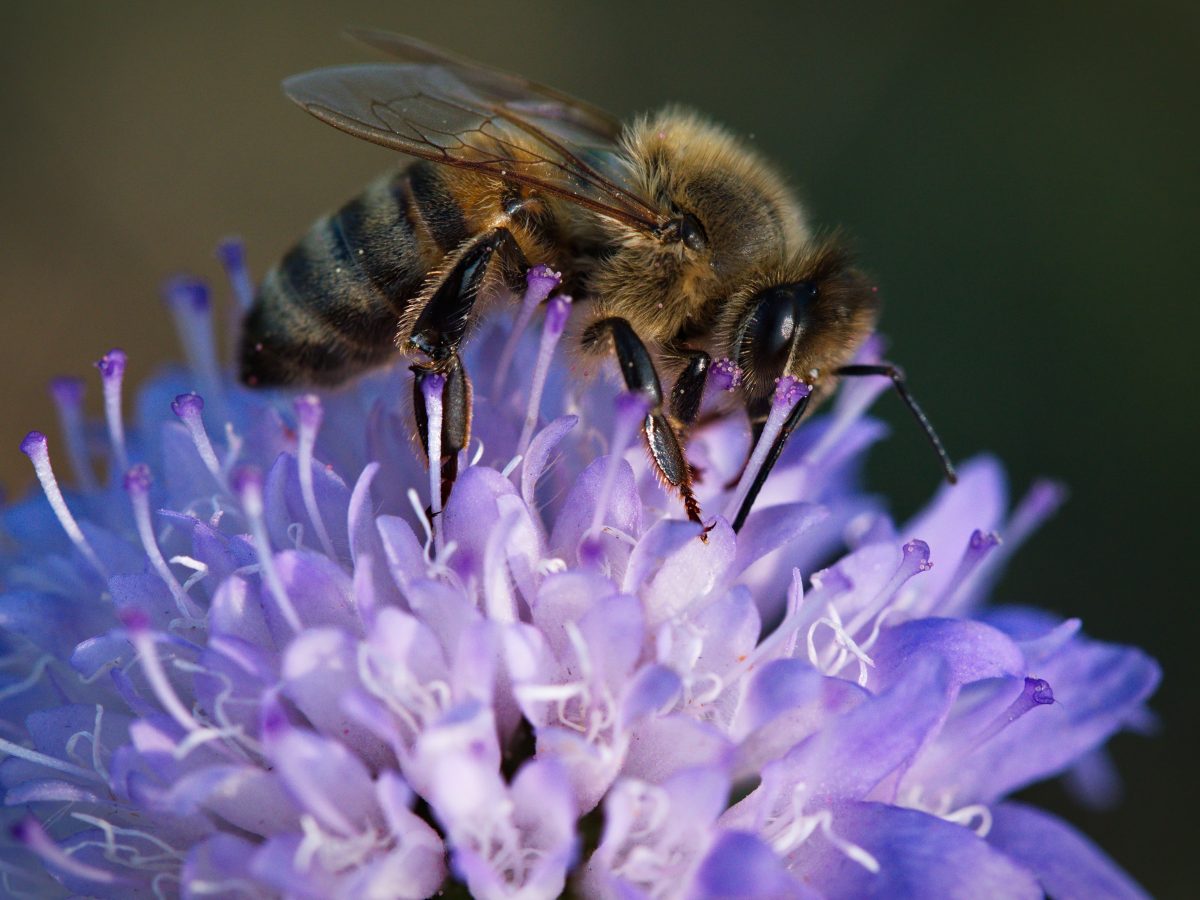
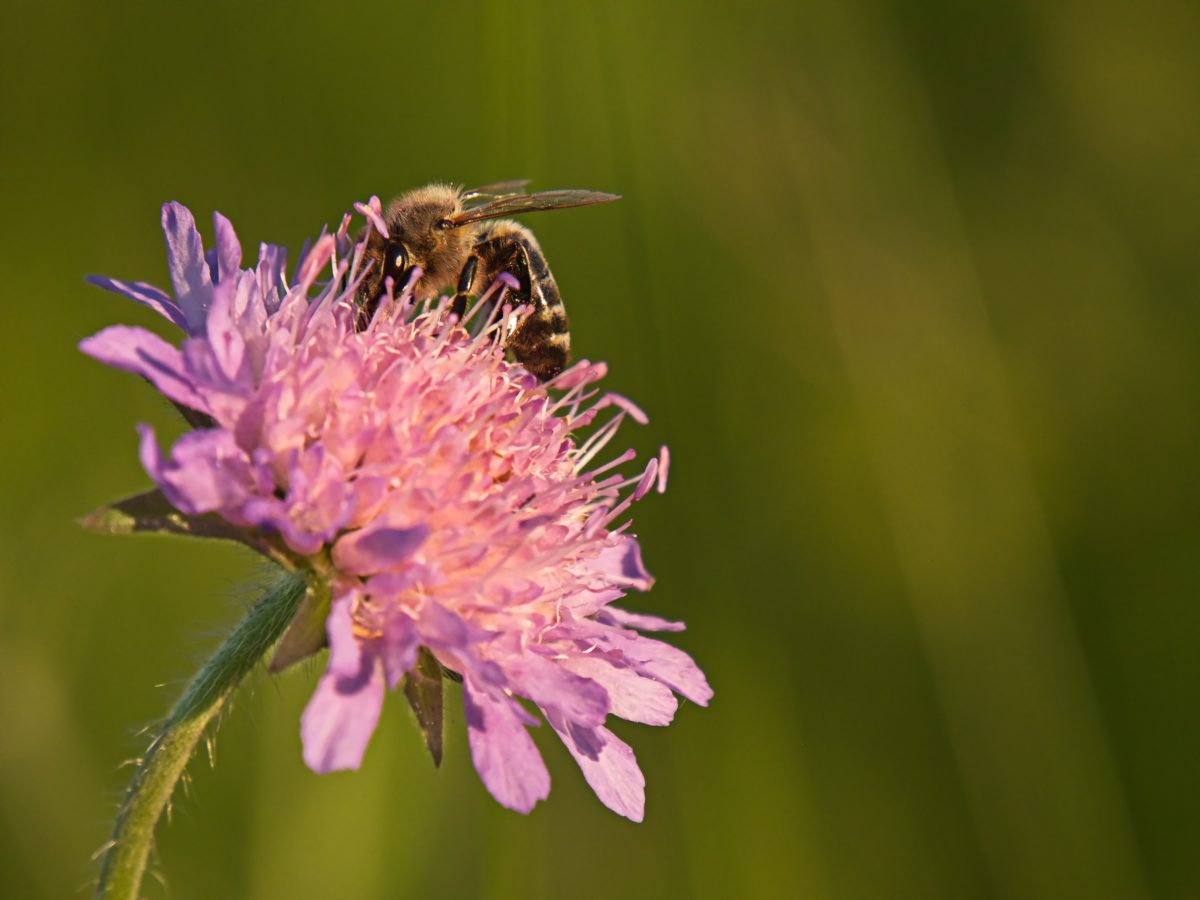
My macro photography setup for nature walks
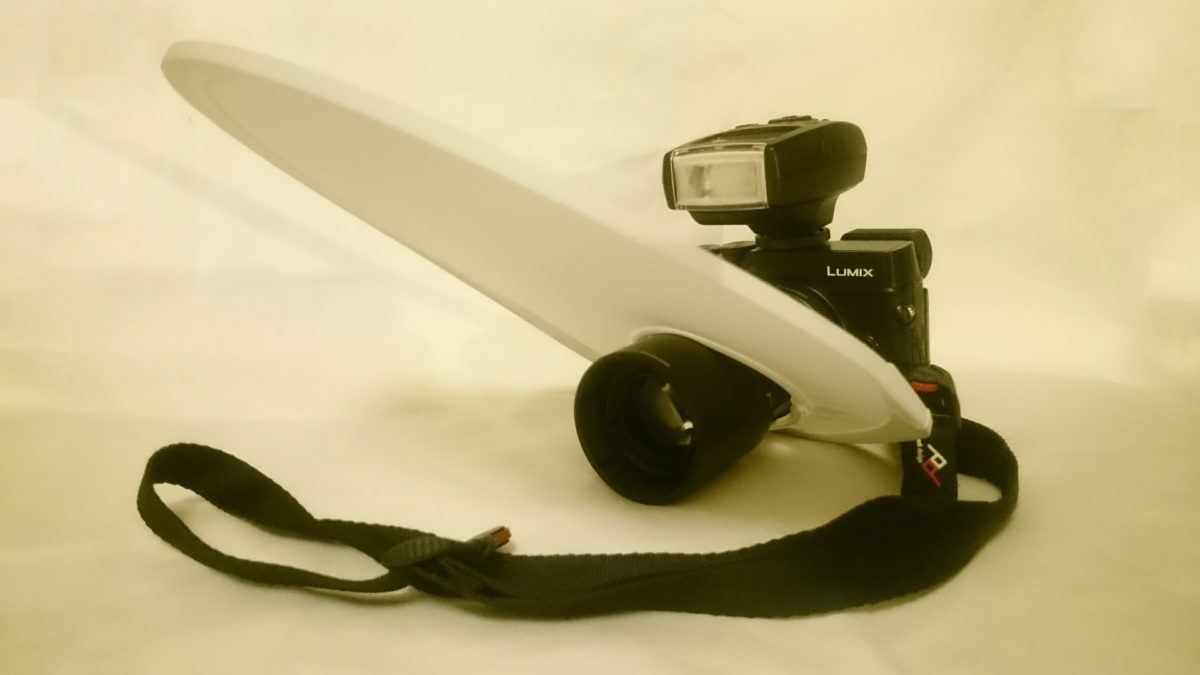
As a camera, I use a Panasonic Lumix GX8 (micro-four-thirds sensor). It has a 20MP sensor, image stabilization, convertible display, a huge viewfinder, and is packed with features. I own it now for a year and really enjoy it.
Some time ago, I invested in an Olympus 60mm f2.8 Macro lens which is now part of my macro walk-around setup. See also my article about the unboxing and the first test shots.
I quickly noticed, that getting a reasonable shutter speed when photographing at macro-scale outdoors can be very challenging. As you get close to your subject, you cast shadows and also you likely have to stop down your aperture to extend the shallow depth of field. Therefore, an external light source like a speedlight makes life so much easier. One problem with an on-camera flash in macro photography is, that the shadow cast by the lens might hit the subject. Also, the flash might lead to very bright spots on the subject. To mitigate the hotspots and shed more light on the subject, I use a diffuser around the lens. Notice, this diffuser is not a static thing for me: I move it, bend it to the front, take it off and handhold it, to get the right lighting on the subject.
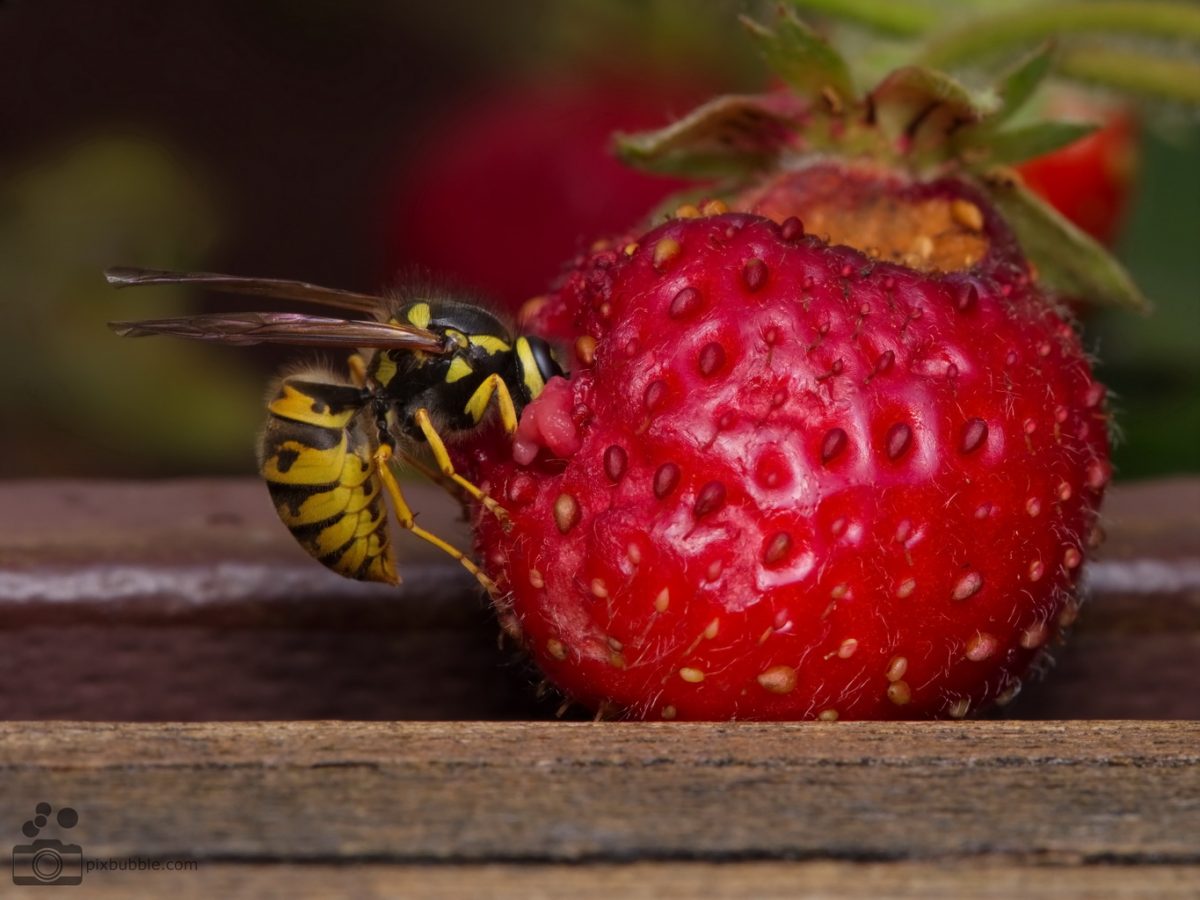
This picture was taken exactly with this setup. The settings were ISO200, f9, 1/125s. Regarding focusing: I use the autofocus, but not in a conventional way. The lens has a button to set it to the closest focus. I first use that to get faster focusing. Then I use back-button-focusing with a small selected focus area, which I place according to my composition. The bb-focus also works when the camera is in manual focus mode and shows me the focus peaking. I will cover the topic of focus and focusing in macro photography in a later part of this post series.
Stay in contact
This is part 1 of my post series about macro photography. If you want to be informed about upcoming posts, subscribe to my newsletter. If you liked this article, share it with your friends on Facebook. Do you have a question or a remark on the content? Leave a comment below or write me a message.
[…] was part two of the macro photography article series. If you missed part one, go and check it out. Make sure to subscribe to my email list to get notified about part three of […]
[…] had no better way of making the best from this situation than fetching my camera (gear as described here). The result is a picture of the week and also made it to my macro […]